Abstract ocean painting

I found this photo on Pinterest from aimee-weaver and thought, "hey, we could do this for my parents for Christmas."


My sister has been looking for a painting of an open space for them with no luck. We haven't found anything worth blowing $50-100 over. I've calculated that if we do this ourselves, we could save a lot of money AND get what we want.

The trip to Home Depot got us a large 1/4" x 4' x 8' board. We got them to cut it for us into three pieces, one of those were a 4' x 2.5'. We also got simple wall paint: self-priming pure white, a deep blue and an aqua. I also got brushes from the dollar tree: 2 for $1 :D

Let's start.

Here's our board. We like the cracks, but if you don't, invest in better boards. We opted for the cheapest piece because we really like the texture and cracks. Plus, we wanted to save money :)


Take your board and sand it down. It'll help hold the paint and reduce splinters. We like the cracks, but if you don't, invest in better boards.


Once done, flip it around to the back and install a french cleat hanger. We also stuck cabinet cabinet cork pads on the hanger before installing the screws because they were a bit longer than the thickness of the board—we didn't want the screws to go through the board.


If you're weak like me, use a drill to pre-drill a hole before installing the screw. If you're strong like my sister, you can use your bare strength.


Ok flip it over. Start painting the self-priming pure white all over the whole board. This will act as a base.


Wait until your white paint is half way dry. Mix a small amount of white and blue paint to create light blue. Paint the light blue at the top.


Add blue.


Add aqua. Blend between blue and aqua.


Blend aqua down to the white at the bottom. Done! Hang!


Sorry for the bad photos! :(


Halloween!


Halloween this year will be chilled but also cool, too. I finally have met an animal who will let me dress him up in a costume. I present to you, Gizmo, the bumblebee!

20131028-IMAG2900


20131028-IMAG2899

I couldn't find a cute dog costume so I bought a human costume with wings and antennae for him.

My sister and I also went to Walmart and got a pumpkin for $4. I only bought one pumpkin but I wanted to carve a cat carving and a dog carving to honor Suppy and Rocky.
20131029-IMAG2901
Kitty cat carving for Suppy poo pie.

20131030-IMAG2905
A howling dog for Rocky pup.

Rest well beautiful animals and happy Halloween!

DIY Necklace & Earring Hanger from Tree Branch

A few days ago, I accidentally stumbled upon a few posts on Pinterest about DIY necklace hangers made from tree branches or scraps of wood.

My mother is a hoarder—she even keeps branches of trees she cut down. It's weird, but I found a branch from her cherry tree she trimmed last year. Thank you, mother, your hoarding problem finally paid off :D

So after stealing my mother's cherry branch, aka trash, I went to Home Depot looking for small cup hooks to use on my hanger. Alas, the size I wanted were all gold. I'm not a fan of this color :| I went home a little disappointed, but decided to go ahead and use my father's stash of regular nails.

Take a branch—anything you like. Make sure it's dry.


I sprayed it with a matt varnish to seal the wood and give it a darker shade of wood.


Add nails.


I added a nail approximately every one inch. Some of my necklaces are bulky so they need space between them.


Bam. Done. Remember to make another one for your earrings.


TIP: If you use nails, because they are straight, make sure you angle the nails downwards when you hammer them in. That way the head of the nails are going upwards. Your necklaces won't move or fall off the nails. I made the mistake of not thinking about that until the end so I had to fix all the nails later.


My Very First Garment!


One fine day, I decided to jump headfirst into sewing a dress. I always said that I'll learn to sew clothes ever since high school and it has been at 16 years since I first started high school. So I grew some balls ovaries and bought a pattern, specifically this one by Simplicity. I also bought a cheap remnant silk piece because I figured my first project shouldn't be wasted on really expensive materials.

After many hours of cutting the pattern, laying out the pieces to fit my tiny remnant piece, learning to sew a french seam (because I don't have a serger), adjusting the pattern because I have a short torso and short in general, I created this monster!

Behold!
943694_10102302218717043_1531021449_n


Many more hours after this were devoted to pinning, ripping out seams, restitching seams, inserting zippers, hemming, and ironing. I also ran into a bunch of mishaps.

First problem: the zipper I bought previously was too short, I had to go buy a longer one or else it wouldn't open enough for my giant butt to wiggle in.

Second problem: I was an idiot and didn't buy an invisible zipper so the back is ugly. Please forgive this mistake, master of all sewing! I will always wear this dress with my hair down so people can't see my mistake.

Third problem: I didn't get bias tape and didn't spend the time to research it so the edges on the arm holes are wrinkly.

Fourth problem: I forgot to compensate for my itty bitty titties so I ended up with a lot of room in the bust area. I tried to fix this by making the back a bit smaller but probably will need to stuff my bra for it to look correct.

Fifth problem: My craftmanship resembles that of a 5-year-old. But soon, it will increase to the level of Forever21 clothes for sure!

If the previous five problems are overlooked, the dress is great. Tada! 


Close up of the bow my sister tied for me.

20130811-DSC_8453


Close up of the neck.
20130811-DSC_8454


Here's me looking so happy to finish my first ever wearable project!

20130811-DSC_8449


Lessons learned:
1. Shouldn't have try to make such a structured dress for the first time.
2. Shouldn't use thick silk because everything was hard and bulky.
3. Shouldn't have use a light and solid color since it was very hard to hide mistakes. My sister said a floral print fabric would work a lot better.
4. Making clothes is really fun!

Reusing flowers and jars

I'm a contributor and I never post :P

This isn't as "crafty" a post as my sister's, but just thought I post something for funsies.

Last week a girl with the same name as me got married. Whoa. I thought I was getting married. Her wedding favor was a glass jar full of vanilla and juicy pear jelly beans. My sister gave me the idea of reusing these as vases. Of course it didn't work so well if I had no flowers.

The next day someone gave me flowers. Whoa again. I put them in a large vase, but it was too big. With my black thumbs, I "attempted" to take care of them, but poor flowers didn't survive for long. Some of them are sturdier than others, so I put my sister's idea to good use.

Shorten the stems on the surviving flowers and put them into the glass jars.


Dead flowers that were left. These are ugly phone photos!


Suppy


20120720-DSC_0067


971435_10102094306380033_1059530057_n


1012635_10102216433601103_296291518_n

Bag From A Bag


Every two weeks, I go to the airport and feed a colony of feral cats. Don't worry, the cats are fed every day, just not by me. I usually carry around this free reusable type of bag to store my cat food, canned food, and water. However, this reusable bag was dying. There were several holes in it already. Since I use up a 16-lb of dry cat food every month for these feedings, I have been collecting a lot of empty cat food bags. I knew I should use them for something but I didn't know what. One day, I saw this tutorial on how to make a bag out of old cat food bag. You know where this is going. But before we go anywhere, I got a sewing machine!

20130723-DSC_8424

It's pretty.


20130723-DSC_8423

Before doing anything I washed the bag really well with delicious smelling soap because cat food tends to be stinky after a while. Then I just cut open the bottom (it was taped together) and cut the bag in half.


20130723-DSC_8425

Turn everything inside out!

20130723-DSC_8427

Sew a line about 1/4" from one end then make a mark 2" from the edge.


20130723-DSC_8428

Open up the bags and fold it down. Sew a line across where the 2" mark was made. Do this for both corners. Repeat the same process for the other bag halve.


20130723-DSC_8429

Flip one of the halves right-side out. Then stuff the inside-out halve inside the other one. That way both the inside and outside of the bag will now have prints on them.


20130723-DSC_8430

Fold the lips down and sew the two halves together.


20130723-DSC_8435

Punch two holes on each side of the bag.


20130723-DSC_8434

Grab some twine or some ribbons.


20130724-Photo on 7-24-13 at 5.51 PM #2

Loop the twine or ribbon through the holes and tie them together to create handles.


20130724-Photo on 7-24-13 at 5.51 PM

Display the newly made bag proudly and use it like a boss!

I decided to not do the cloth lining like the Instructables tutorial because I wanted something easy to clean and sturdier. So half of the original bag was used as a lining. Since I didn't have any wide ribbons for a handle, I went with the hole punch and twine method because I didn't want to figure out how to sew a thin, round, and hard piece of twine between the outer layer and the lining. Those are the only things I changed from the tutorial.

A Rant


WARNING: This post is very negative and it doesn't match very well with the positive attitude I'd like to keep for this blog.

In an effort to make sure that my lifting forms are good so I won't hurt myself at the gym, I've been searching and watching a lot of Youtube videos on proper forms. Whilst going through all the videos, I came across the 2012 European Championships Women 58kg. I started watching it because these women are around my size and they lift like crazy. Watching people compete in something that I enjoy doing is very fun, as many people would agree with me.

Now, I knew that comments on Youtube are dumb and I usually skipped over them. However, today was not a good day for me because I decided to read the comments. They were atrocious and I couldn't make it past the 2nd page of the comments. I had to stop before my perfect blood pressure raises too high.

These are 58kg (127 lbs) women snatching twice their own body weights. Yet, comments are all relating on how they look such as "Just like to watch zoe smith hot," "Im in love with zoe smith shes good looking and very cute," and "Iam afraid an horney at the same time" or "what you look like without make up" or "these women would produce good offspring."

To these people, I ask: Who the fuck cares if you're horny? These women don't know you exist and I doubt they would want to bone you anyway. They would probably snatch, clean, jerk, and then throw you out of the window.

None of the comments are relating to how these women can basically snatch most of the male commenters sitting on behind their computer screens judging the women on their looks and their ability to bear children. No one commented on the competitors' skills or techniques. These women who do what they love and are very good at it get no compliments for their accomplishments. Never mind that they probably trained 8 hours a day for years, stuck to a strict lifting diet, have the desire to better themselves and be the best. Nor does it matter that a great amount of mental discipline also went into weightlifting years after years. No no, none of that matter at all. As long as they're hot, they'll get plowed by the manly men and all is well. If they're ugly, they'll get called a troll and jokes will rain on them. All will be fine and dandy.

Even though I didn't make it far enough within the comments to see the comments about how these women are manly looking and gross, that they need to look more feminine, I know that these comments are out there. I've read enough forums to know that is the general consensus on women who lift weights. All I have to say is that people train for different things. Some people train to look good (female and male models, actors and actresses, etc.) and some people do not care for looking manly/feminine and they only train for strength. Applaud them for their achievements rather than critic them on how they do or do not fit your own mould of attractiveness. You do not need to be attract to someone to say "Oh hey, I think you're great at what you do."

I am aware that not all men and women are like this. In fact, the men and women I know are wonderful human beings. They are great friends, generous people, intelligent members of society. I'm jut surrounded by really wonderful people that I sometimes forget that there are a portion of the world out there who are not very nice. Once in a while, I encountered them through the internet and it's ugly. It makes me sad and angry.

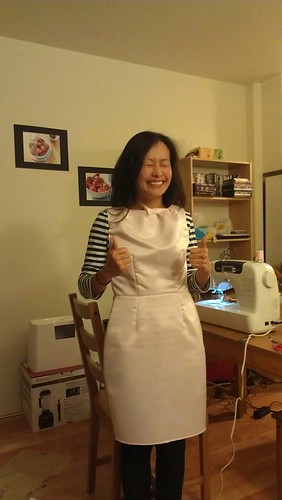
I don't want to spend the whole day brooding because of some jerks on the internet. I also know that I alone cannot make a mass of people change their ways of thinking. Getting sad and angry will only hurt me and does nothing to hurt anyone else. So I will go on with my day and be the best I can be. By the way, last night, I deadlifted 185 lbs which is only 15 lbs away from my deadlifting goal for this year.

Cheers!

Granny Square Blanket


20130525-DSC_5457

Some time last year, I read this blog post from According to Matt and decided that I want to make a granny square blanket, too. I have never made a blanket before and it would be nice to start on this project.

After deliberating with my sister, the graphic designer, we came up with a color scheme and combinations for my blanket. My sister said that I should just go with two-color combination as opposed to three-color like Matt did on his blog. This would make things easier for me and I like the idea of more white.

On August 8th, 2012, I started my first granny square. I have set a goal for myself that I should make at least one square each day and gave myself one whole year to make 432 squares. That would allow me with a blanket of 18x24 squares.


20130525-DSC_5459

I'm happy to report that I have finally went over the 50% mark. I've been way behind on my progress but I'm quickly catching up. Currently, there are 281 squares completed and I have 2 months left to finish the other 151 squares. Once the squares are finished, I will have to join them together and I figure that would take at least another month. By the time I'm finished, the cold season will creep around. Perfect!